The older I get the more I am concerned about what goes into our mouths....I've always cooked from scratch, but have also taken short cuts and used canned foods, like the creamed soups that had way too much junk in them and processed foods that shouldn't even be labeled food!
I wanted to get back to real food.....I wanted my family and I to eat food that our bodies recognize and can use instead of storing it away as fat because our bodies have no idea what to do with it! Plus omitting the chemicals and things I am unable to pronounce just made sense to me!
I also notice when my kids eat junk their behavior gives them away every time! There is something to be said for keeping food whole... I've been a witness to major meltdowns because of what they have taken in. I have also seen digestive problems decrease as we eliminate the junk!
So I have been on this whole food kick for a couple of years. Now I must be honest and tell you I just didn't quit cold turkey and I do eat some junk from time to time but no where near what I use to! What a difference it has made! I feel better...more energy....well as much as I can feel being pregnant..baby seems to be sucking some of that energy up from time to time, but all in all I really feel good!
I wanted to share with you my Almond Butter recipe...Have you ever looked at the label of a p-nut butter jar? Yikes! Very scary! And I love p-nut butter! I also knew I needed a natural alternative.....Now this is not as creamy as the store bought but I don't mind......There is one thing I have learned over the years of eating and that is what your body eats your body craves! If you eat healthy food you will crave healthy food...It's as simple as that!
2 Cups Almonds
1/4 Cup Real Maple syrup
Sprinkle of sea salt
1/4 cup Raw honey
2 Tbl. of coconut oil
Take your two cups almonds mix them up with your maple syrup. Pour them on to your baking sheet, sprinkle them with sea salt and roast for about 20 minutes making sure to toss them at least once. Take them out and let them cool for ten minutes before you put them into your food processor.
Put them in your food processor and add your coconut oil and raw honey. Blend until creamy......Mmmmmm
You will need to store this in the fridge. I thought about canning it and researched it. Some say because of the consistency you will not be guaranteed a perfect seal...So I just decided that you can store nuts very easily and I will just make it as I need it.
If you don't like the taste of coconut you can use the expeller Pressed coconut oil and it won't have the taste. Or you can use another natural oil. You can also omit the maple syrup and add an extra teaspoon of raw honey. Just experiment with it until you get the right flavor your looking for.
A place of encouragement:
Living By Faith, Walking in the Light, Saved By His Amazing Grace
Showing posts with label In the Kitchen. Show all posts
Friday, July 27, 2012
Sunday, July 22, 2012
Homemade Vanilla
Labels:
In the Kitchen
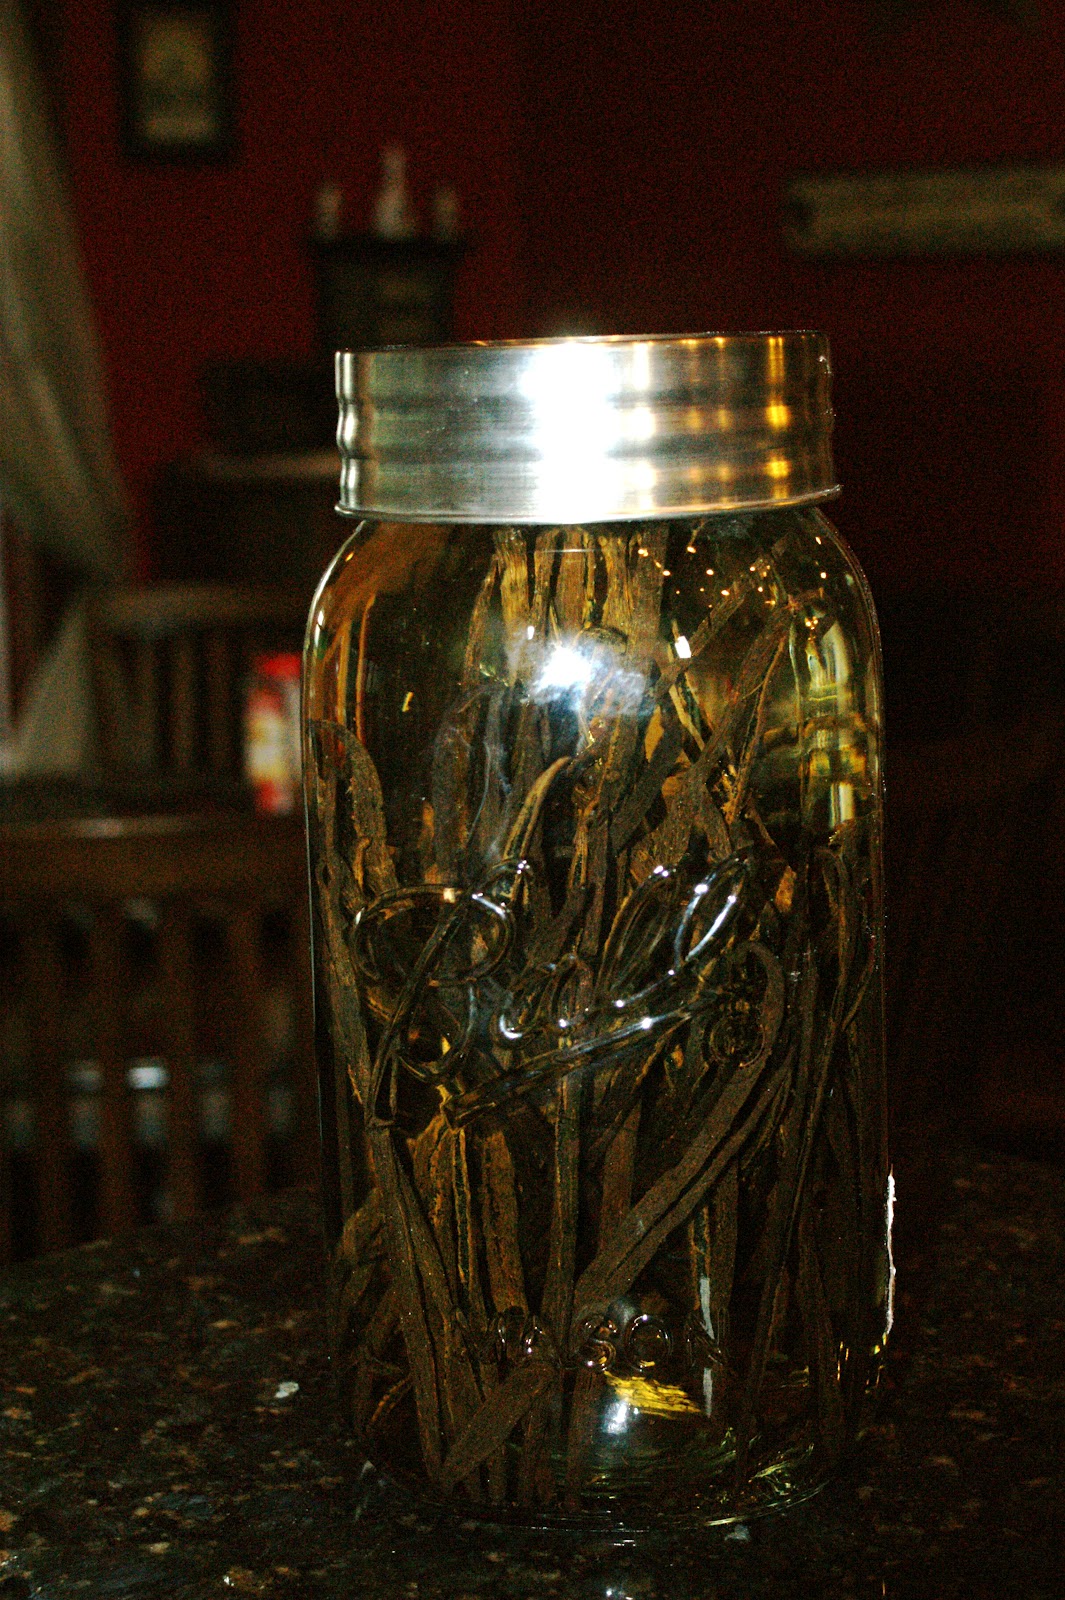
Isn't this Beautiful?
In order to make this amber goodness I have to make an awkward stop at the liquor store.....But you really can tell the difference in your baking and cooking when you make your own!
I found this gallon size Ball jar at Target and thought it would be perfect for my Homemade Vanilla!
All you need is two 1/2 gallon bottles of Vodka and about 65 to 70 Vanilla beans. split your beans in half and place them in your jar. Pour the vodka in.....Let brew in jar for about 6 months in a dark, cool place. Put in smaller decorative jars and give away as gifts or keep them for yourself and stock your shelves!
I keep sniffing my fingers cause they smell like vanilla! Mmmmmmm
In order to make this amber goodness I have to make an awkward stop at the liquor store.....But you really can tell the difference in your baking and cooking when you make your own!
I found this gallon size Ball jar at Target and thought it would be perfect for my Homemade Vanilla!
All you need is two 1/2 gallon bottles of Vodka and about 65 to 70 Vanilla beans. split your beans in half and place them in your jar. Pour the vodka in.....Let brew in jar for about 6 months in a dark, cool place. Put in smaller decorative jars and give away as gifts or keep them for yourself and stock your shelves!
I keep sniffing my fingers cause they smell like vanilla! Mmmmmmm
Tuesday, June 12, 2012
Banana Bread With Honey & Applesauce
Labels:
In the Kitchen
This is my tried and true, old faithful banana bread recipe! It never lets me down. I have always substituted the applesauce for the oil but, never used honey for the substitute of sugar, until now..........
I discovered another Banana bread recipe on Pinterest I pinned it because it was made with honey instead of sugar. Then I had a friend tell me she tried the recipe I had pinned with very little success.....It didn't raise well for her and was bitter.
So I went to my recipe box and pulled out old faithful. I had to see if I could make this work.....After all what did they use for sweetness before man messed with the natural state of food?
Did I tell you this recipe never lets me down? I was afraid that it might not be sweet enough or rise like it normally does but, it turned out BEAUTIFUL....Tastes just as sweet and looks just as pretty!
So now I am pleased to share this healthier version but not lacking in flavor or beauty, Old Faithful Banana Bread Recipe!
5C Flour
1 1/2 C Raw Honey
4 tsp. Baking powder
2 eggs
2 tsp. sea salt
6 Tb. Applesauce
1 1/2 C whole milk
3 ripe bananas cut into chunks
Mix all ingredients in a large bowl pour into greased loaf pans and bake @ 350 for 55 to 60 minutes. Or until tooth pick comes out clean. This makes two loaves.
That's it! So simple....So much healthier and so GOOD! Enjoy with a drizzle of honey butter. Mmmmmm soooo yummy!
I discovered another Banana bread recipe on Pinterest I pinned it because it was made with honey instead of sugar. Then I had a friend tell me she tried the recipe I had pinned with very little success.....It didn't raise well for her and was bitter.
So I went to my recipe box and pulled out old faithful. I had to see if I could make this work.....After all what did they use for sweetness before man messed with the natural state of food?
Did I tell you this recipe never lets me down? I was afraid that it might not be sweet enough or rise like it normally does but, it turned out BEAUTIFUL....Tastes just as sweet and looks just as pretty!
So now I am pleased to share this healthier version but not lacking in flavor or beauty, Old Faithful Banana Bread Recipe!
5C Flour
1 1/2 C Raw Honey
4 tsp. Baking powder
2 eggs
2 tsp. sea salt
6 Tb. Applesauce
1 1/2 C whole milk
3 ripe bananas cut into chunks
Mix all ingredients in a large bowl pour into greased loaf pans and bake @ 350 for 55 to 60 minutes. Or until tooth pick comes out clean. This makes two loaves.
That's it! So simple....So much healthier and so GOOD! Enjoy with a drizzle of honey butter. Mmmmmm soooo yummy!
Monday, May 7, 2012
Chicken Pot Pie From Scratch
Labels:
In the Kitchen
The first thing you need to do is boil a whole chicken. You want just enough water to cover the chicken.When done pull chicken out of the water and set aside to let cool. Take the homemade broth and either place it in the fridge to let the fat harden so you can skim it off the top or strain it through a gravy strainer to separate the fat.
The next thing you want to do is de-bone the chicken and place it back into your broth. Add chicken bullion.
While simmering add your favorite veggies and seasonings and cook until tender. Thicken it with corn starch and water.
Make a double crusted pie crust and roll it over the top.
Place it in the oven at 350 for about 35-45 minutes. I apologize for not having exact measurements but this is how I cook a lot! A little bit of this and a little bit of that! (or a lot) Depends on what it is.....
I have even been known to just fry up some boneless chicken breast and cut it up into chunks add enough water to cover your meat and veggies add the bullion and thicken it. That way you don't have to mess with separating the fat. Or you could just take all the skin off your chicken....But the fat does give it nice flavor!
The next thing you want to do is de-bone the chicken and place it back into your broth. Add chicken bullion.
While simmering add your favorite veggies and seasonings and cook until tender. Thicken it with corn starch and water.
Make a double crusted pie crust and roll it over the top.
Place it in the oven at 350 for about 35-45 minutes. I apologize for not having exact measurements but this is how I cook a lot! A little bit of this and a little bit of that! (or a lot) Depends on what it is.....
I have even been known to just fry up some boneless chicken breast and cut it up into chunks add enough water to cover your meat and veggies add the bullion and thicken it. That way you don't have to mess with separating the fat. Or you could just take all the skin off your chicken....But the fat does give it nice flavor!
Sunday, April 29, 2012
Home Made Bread
Labels:
In the Kitchen
I bought a grain mill a while back and have been loving the fact that I can grind wheat and make my own flour with out any additives or bleaching. Although I didn't realize that you had to add Vital wheat gluten so that your cakes and breads would rise and not be heavy.
This my sweet friends is called Chocolate Zucchini Bread and it is heavenly. Puts a whole new twist on Zucchini Bread! A special friend of mine shared this recipe with me and I want to share it with you......
Chocolate Zucchini Bread
Ingredients:
1 1/2 Cups sugar
1 Cup apple sauce
3 Eggs
3 Tsp. Vanilla Extract
2 1/2 Cups Flour
1/2 Cup Baking Cocoa
1 Tsp. Salt
1 Tsp. Soda
1 1/2 Tsp. Ground Cinnamon
1/4 Tsp. Baking Powder
3 cups Shredded Zucchini
1 1/2 Cup Semi Sweet Chips
Directions:
In a large bowl, beat sugar, applesauce, egg and vanilla. Combine the flour, cocoa, salt, b. soda, cinnamon and b. powder. Gradually beat into sugar mixture. Stir in zucchini and chocolate chips. Pour into 2 loaf pans coated with non-stick spray.
Bake at 350 for 50-55 minutes or until tooth pick comes out clean.
Note: you can substitute the applesauce for 1 cup of oil but I used applesauce and you can not tell a difference. It tastes just as good and it's a lot healthier for you!!
And yes my family Loved it!!
This next recipe is so good! Keeps a nice shape. Great for toast and sandwiches! This one also called for oil but, I added applesauce instead and still, it tasted just as good....Maybe even better!
Honey Wheat Bread
Ingredients:
2 Cups Wheat Flour
1 Tb. yeast
1/2 Cup Applesauce
1 Tsp. Salt
1/2 Cup Honey
4-5 Cups Flour
2 1/2 Cups warm water
Directions:
In a large bowl add 2 cups wheat flour, 1 Tb. yeast, 1/2 Cup Applesauce1/2 Cup honey and 1 Tsp. salt. Mix well. Then add your warm water. Mix in the rest of your flour and turn dough out on counter top to knead until smooth. Let rise in bowl for 1 hour. Punch down and cut dough in half and place it into two loaf pans sprayed with pam. place in the oven at 350 for about 45 minutes or until tooth pick comes out clean.
Note: If you don't have whole wheat flour just use regular white.....Works good both ways. With the white flour it will be a lighter, airier bread.
Any time you can make home made bread, (or home made anything for that matter) your giving your family your very best! No preservatives! And so yummy!
Happy Bread Making!
This my sweet friends is called Chocolate Zucchini Bread and it is heavenly. Puts a whole new twist on Zucchini Bread! A special friend of mine shared this recipe with me and I want to share it with you......
Chocolate Zucchini Bread
Ingredients:
1 1/2 Cups sugar
1 Cup apple sauce
3 Eggs
3 Tsp. Vanilla Extract
2 1/2 Cups Flour
1/2 Cup Baking Cocoa
1 Tsp. Salt
1 Tsp. Soda
1 1/2 Tsp. Ground Cinnamon
1/4 Tsp. Baking Powder
3 cups Shredded Zucchini
1 1/2 Cup Semi Sweet Chips
Directions:
In a large bowl, beat sugar, applesauce, egg and vanilla. Combine the flour, cocoa, salt, b. soda, cinnamon and b. powder. Gradually beat into sugar mixture. Stir in zucchini and chocolate chips. Pour into 2 loaf pans coated with non-stick spray.
Bake at 350 for 50-55 minutes or until tooth pick comes out clean.
Note: you can substitute the applesauce for 1 cup of oil but I used applesauce and you can not tell a difference. It tastes just as good and it's a lot healthier for you!!
And yes my family Loved it!!
This next recipe is so good! Keeps a nice shape. Great for toast and sandwiches! This one also called for oil but, I added applesauce instead and still, it tasted just as good....Maybe even better!
Honey Wheat Bread
Ingredients:
2 Cups Wheat Flour
1 Tb. yeast
1/2 Cup Applesauce
1 Tsp. Salt
1/2 Cup Honey
4-5 Cups Flour
2 1/2 Cups warm water
Directions:
In a large bowl add 2 cups wheat flour, 1 Tb. yeast, 1/2 Cup Applesauce1/2 Cup honey and 1 Tsp. salt. Mix well. Then add your warm water. Mix in the rest of your flour and turn dough out on counter top to knead until smooth. Let rise in bowl for 1 hour. Punch down and cut dough in half and place it into two loaf pans sprayed with pam. place in the oven at 350 for about 45 minutes or until tooth pick comes out clean.
Note: If you don't have whole wheat flour just use regular white.....Works good both ways. With the white flour it will be a lighter, airier bread.
Any time you can make home made bread, (or home made anything for that matter) your giving your family your very best! No preservatives! And so yummy!
Happy Bread Making!
Friday, December 30, 2011
An Old Recipe
Labels:
In the Kitchen
You can tell when a recipe is worth keeping. The ones that are worth keeping will have crusted flour on them from being used over and over. The ink will be faded because they were that good to use again and again.
I've had this recipe for years. Tucked away in a small box. A box that wasn't quite full. One that I had before we were married. And I remember making this for my very first time and my family raving over how wonderful it was. My love for being in the kitchen started early. Mama taught me all she knew. Some of my most cherished moments are the ones in the kitchen with Mama.
I want to share this recipe with you. It was the very first bread I had ever made. It's funny that I remember stuff like that.......And sad that in some instances I can't remember a name......
Steam Line Batter Bread:
1 Pkg. Active dry yeast
1 1/4 C. warm water
2 Tb. Shortening
2 Tb. Sugar
2 tsp. Salt
2 2/3 C. Flour
Dissolve yeast, add shortening, sugar, salt and 2 cups of the flour. Mix add rest of flour. Cover bowl and let rise 30 minutes. stir down batter. Put in a loaf pan or make a round out of it and let rise for another 40 minutes. Bake at 375 for 45 minutes.
It's a beautiful bread. Perfect for soups. Fresh out of the oven with butter melted all over.......
Recipes are like old friends. They are worth spending time with. Worth holding onto, even if they have stains and look a little worn, all that just means they have stood the test of time. It's the ingredients that blend so well together, that keeps you coming back for more.
Enjoy!
I've had this recipe for years. Tucked away in a small box. A box that wasn't quite full. One that I had before we were married. And I remember making this for my very first time and my family raving over how wonderful it was. My love for being in the kitchen started early. Mama taught me all she knew. Some of my most cherished moments are the ones in the kitchen with Mama.
I want to share this recipe with you. It was the very first bread I had ever made. It's funny that I remember stuff like that.......And sad that in some instances I can't remember a name......
Steam Line Batter Bread:
1 Pkg. Active dry yeast
1 1/4 C. warm water
2 Tb. Shortening
2 Tb. Sugar
2 tsp. Salt
2 2/3 C. Flour
Dissolve yeast, add shortening, sugar, salt and 2 cups of the flour. Mix add rest of flour. Cover bowl and let rise 30 minutes. stir down batter. Put in a loaf pan or make a round out of it and let rise for another 40 minutes. Bake at 375 for 45 minutes.
It's a beautiful bread. Perfect for soups. Fresh out of the oven with butter melted all over.......
Recipes are like old friends. They are worth spending time with. Worth holding onto, even if they have stains and look a little worn, all that just means they have stood the test of time. It's the ingredients that blend so well together, that keeps you coming back for more.
Enjoy!
Wednesday, November 30, 2011
Soup Stock
Labels:
In the Kitchen
To make the stock you first have to put your left over bones, skin and meat from a turkey or chicken in a large pot, cover with cold water and bring to a boil. Turn down to a simmer and let it simmer about 4 to 6 hours.
Then strain the stock from the bones. I pick what meat is left and put it in a bag in the fridge until I'm ready for it. I then put the stock in the fridge over night to harden the fat so it is easier to separate it from the stock. After I separate, I then put it back on the stove add the meat and the Trinity (onions, carrots, and celery)....And if you like potatoes in your soup now would be the time to add them. Along with your seasonings.
I'm slowly enhancing and changing the way we eat. I've always made things from scratch but, now that I have been educating myself on "real food" it has made me research things that have no m.s.g's and artificial flavorings and preservatives. I use a garlic salt that contains no m.s.g's for flavoring. I have yet to come across a bullion that is chemical free....But when making your own stock it's not really necessary.
Now I know with some of you it may be a time factor....But when you think about it, it really is easy and most of the time that it takes to make it, is when it is simmering on the stove. I put mine on the stove yesterday afternoon and let it simmer while I was making supper. After supper I strained and removed the bones. Then put it in the fridge. Today I will finish it and we will have it for supper tonight.
It is really worth the time and the effort put in. Very healthy for your family. And you can rest assured knowing that there are no chemicals going into there precious vessels!
Then strain the stock from the bones. I pick what meat is left and put it in a bag in the fridge until I'm ready for it. I then put the stock in the fridge over night to harden the fat so it is easier to separate it from the stock. After I separate, I then put it back on the stove add the meat and the Trinity (onions, carrots, and celery)....And if you like potatoes in your soup now would be the time to add them. Along with your seasonings.
I'm slowly enhancing and changing the way we eat. I've always made things from scratch but, now that I have been educating myself on "real food" it has made me research things that have no m.s.g's and artificial flavorings and preservatives. I use a garlic salt that contains no m.s.g's for flavoring. I have yet to come across a bullion that is chemical free....But when making your own stock it's not really necessary.
Now I know with some of you it may be a time factor....But when you think about it, it really is easy and most of the time that it takes to make it, is when it is simmering on the stove. I put mine on the stove yesterday afternoon and let it simmer while I was making supper. After supper I strained and removed the bones. Then put it in the fridge. Today I will finish it and we will have it for supper tonight.
It is really worth the time and the effort put in. Very healthy for your family. And you can rest assured knowing that there are no chemicals going into there precious vessels!
Thursday, November 3, 2011
Our Version of Fish and Chips
Labels:
In the Kitchen
I love Pinterest and this is where I found this lovely idea......
I really don't know why I haven't thought of doing potatoes this way before. All you do is slice your "chips" really thin and arrange them in a baking dish. Take 1 part olive oil and 1 part melted butter and brush your potatoes with the mixture. Season with sea salt, pepper, and basil. You can season with what ever you like. Those are the three I decided to go with. Cover and bake at 375 for about an hour and twenty minutes. The last 10 minutes I pulled the tin foil off and drizzled more melted butter on them and turned the oven on broil.
Don't they look yummy? And since we have been studying England I decided to do our version of their "Fish and Chips" Which is Deep fried fish and large potato fries.
Battered fried fish with fresh corn on the cob from my father in-love's field! The plate is not the prettiest....My family was in a hurry to eat so I couldn't get the prettiest piece of fish to show you all a lovely plate of food!
Batter for the fish:
2/3 cup milk
1/2 cup flour
3/4 tsp baking powder
dash of cayenne pepper
Garlic Salt to taste
Mix all ingredients. Dip your fish in and put in the fry pan. A few minutes on each side. Till golden brown.
It was really good! I have to tell you that my man caught the fish going deep sea fishing a while back. Best tasting fish EVER!
I really don't know why I haven't thought of doing potatoes this way before. All you do is slice your "chips" really thin and arrange them in a baking dish. Take 1 part olive oil and 1 part melted butter and brush your potatoes with the mixture. Season with sea salt, pepper, and basil. You can season with what ever you like. Those are the three I decided to go with. Cover and bake at 375 for about an hour and twenty minutes. The last 10 minutes I pulled the tin foil off and drizzled more melted butter on them and turned the oven on broil.
Don't they look yummy? And since we have been studying England I decided to do our version of their "Fish and Chips" Which is Deep fried fish and large potato fries.
Battered fried fish with fresh corn on the cob from my father in-love's field! The plate is not the prettiest....My family was in a hurry to eat so I couldn't get the prettiest piece of fish to show you all a lovely plate of food!
Batter for the fish:
2/3 cup milk
1/2 cup flour
3/4 tsp baking powder
dash of cayenne pepper
Garlic Salt to taste
Mix all ingredients. Dip your fish in and put in the fry pan. A few minutes on each side. Till golden brown.
It was really good! I have to tell you that my man caught the fish going deep sea fishing a while back. Best tasting fish EVER!
Tuesday, October 18, 2011
Sausage, Rice and Fried Potatoes
Labels:
In the Kitchen
This is an easy dish:
2 Packages of smoked sausage
2 boxes Uncle Ben's Rice, original recipe
4 cups water
1/4 cup brown sugar
1 onion, diced
1 pepper, diced
2 ribs celery chopped
2 zucchini, sliced
6 potatoes
2 cans diced tomato
garlic salt to taste
Wash and cut your potatoes and put them on a griddle and cook them on low heat. While your potatoes are frying. Get a large pot and cook your smoked spicy sausage, onion, pepper and celery in it. Then you add your tomatoes, 4 cups water, 2 boxes of rice, your brown sugar and garlic salt. Cook until rice is done and potatoes are golden brown. Add your zucchini at the last minute to heat through. Place on a platter.
This recipe is for our big family, but it can easily be cut in half.
2 Packages of smoked sausage
2 boxes Uncle Ben's Rice, original recipe
4 cups water
1/4 cup brown sugar
1 onion, diced
1 pepper, diced
2 ribs celery chopped
2 zucchini, sliced
6 potatoes
2 cans diced tomato
garlic salt to taste
Wash and cut your potatoes and put them on a griddle and cook them on low heat. While your potatoes are frying. Get a large pot and cook your smoked spicy sausage, onion, pepper and celery in it. Then you add your tomatoes, 4 cups water, 2 boxes of rice, your brown sugar and garlic salt. Cook until rice is done and potatoes are golden brown. Add your zucchini at the last minute to heat through. Place on a platter.
This recipe is for our big family, but it can easily be cut in half.
Monday, October 17, 2011
Balsamic Pork Chops
Labels:
In the Kitchen
These were yummy! All you do is add butter and olive oil to your pan and heat. In a dish put 1 cup of flour, seasoned salt, red Pepper, and any dried herb, like rosemary or sweet basil. Dredge your pork chops in the flour mixture and place in your pan. You will want to sear each side for 4 minutes.
Take your pork chops out and set them aside. Now you will add about 3/4 Cup of balsamic vinegar, and 1/2 Cup of chicken stock to your already hot pan. Be sure to scrape all the goodies off the bottom. Add chopped onions and fresh Button mushrooms, sliced. Place your pork chops on top. Cover and simmer for about 20 -25 minutes.
I was going to make garlic mashed potatoes but, Butterfly girl has been begging me for quite some time to make home made mac n cheese......How could I say no? She not only watched me in the kitchen, she even helped me make it!
Take your pork chops out and set them aside. Now you will add about 3/4 Cup of balsamic vinegar, and 1/2 Cup of chicken stock to your already hot pan. Be sure to scrape all the goodies off the bottom. Add chopped onions and fresh Button mushrooms, sliced. Place your pork chops on top. Cover and simmer for about 20 -25 minutes.
I was going to make garlic mashed potatoes but, Butterfly girl has been begging me for quite some time to make home made mac n cheese......How could I say no? She not only watched me in the kitchen, she even helped me make it!
Sunday, October 16, 2011
Deep Dish Apple Crumb Pie
Labels:
In the Kitchen
Over the years one of the many memories I hold dear as a child, is watching my Mama in the kitchen. Her ability to make mouth watering , picture perfect pies has always amazed me. Her crust could of won a blue ribbon every time! I've had this deep, heart shaped dish for years....It makes a wonderful pie!
For this pie I peeled, cored and sliced 8 to 10 apples. Put them in a large pot with about 2 cups water and cook until they are heated all the way through. Add 1 cup sugar and 1 tsp. apple pie spice. Thicken with corn starch and pour into your pie shell. Then I make a brown sugar topping, which consists of 1 stick melted butter, 1 cup brown sugar, and 1 cup flour. Mix til crumbly and sprinkle over apples. Bake @ 350 for about 45 minutes or until golden brown and bubbly.
My Mama use to say, "The more you bake the more you become good at telling it's ready just by the smell that fills the kitchen."
My Mama always made cinnamon sticks with the left over pie dough. All you do is spread them out thin, sprinkle cinnamon sugar on top and bake in the oven for 12 to 15 minutes. So simple and oh so good!
Pie crust Recipe:
1 cup of Crisco
2 tsp. salt
2 2/3 cup flour
8 to 10 Tb. cold water
Mix your ingredients until it forms a ball. Add flour as needed. Flour your counter top and roll it out. This recipe will make 2 crusts.
Make some memories with your kids and let them watch you......Give them the extra dough and let them make their own creation. Just have fun!
For this pie I peeled, cored and sliced 8 to 10 apples. Put them in a large pot with about 2 cups water and cook until they are heated all the way through. Add 1 cup sugar and 1 tsp. apple pie spice. Thicken with corn starch and pour into your pie shell. Then I make a brown sugar topping, which consists of 1 stick melted butter, 1 cup brown sugar, and 1 cup flour. Mix til crumbly and sprinkle over apples. Bake @ 350 for about 45 minutes or until golden brown and bubbly.
My Mama use to say, "The more you bake the more you become good at telling it's ready just by the smell that fills the kitchen."
My Mama always made cinnamon sticks with the left over pie dough. All you do is spread them out thin, sprinkle cinnamon sugar on top and bake in the oven for 12 to 15 minutes. So simple and oh so good!
Pie crust Recipe:
1 cup of Crisco
2 tsp. salt
2 2/3 cup flour
8 to 10 Tb. cold water
Mix your ingredients until it forms a ball. Add flour as needed. Flour your counter top and roll it out. This recipe will make 2 crusts.
Make some memories with your kids and let them watch you......Give them the extra dough and let them make their own creation. Just have fun!
Friday, October 14, 2011
Good Morning Breakfast Cake
Labels:
In the Kitchen
Meet Hattie, My egg basket hen...Shhhh...she doesn't know those are Duck eggs she is setting on.
Our ducks started laying eggs in late September and so the baking begins......
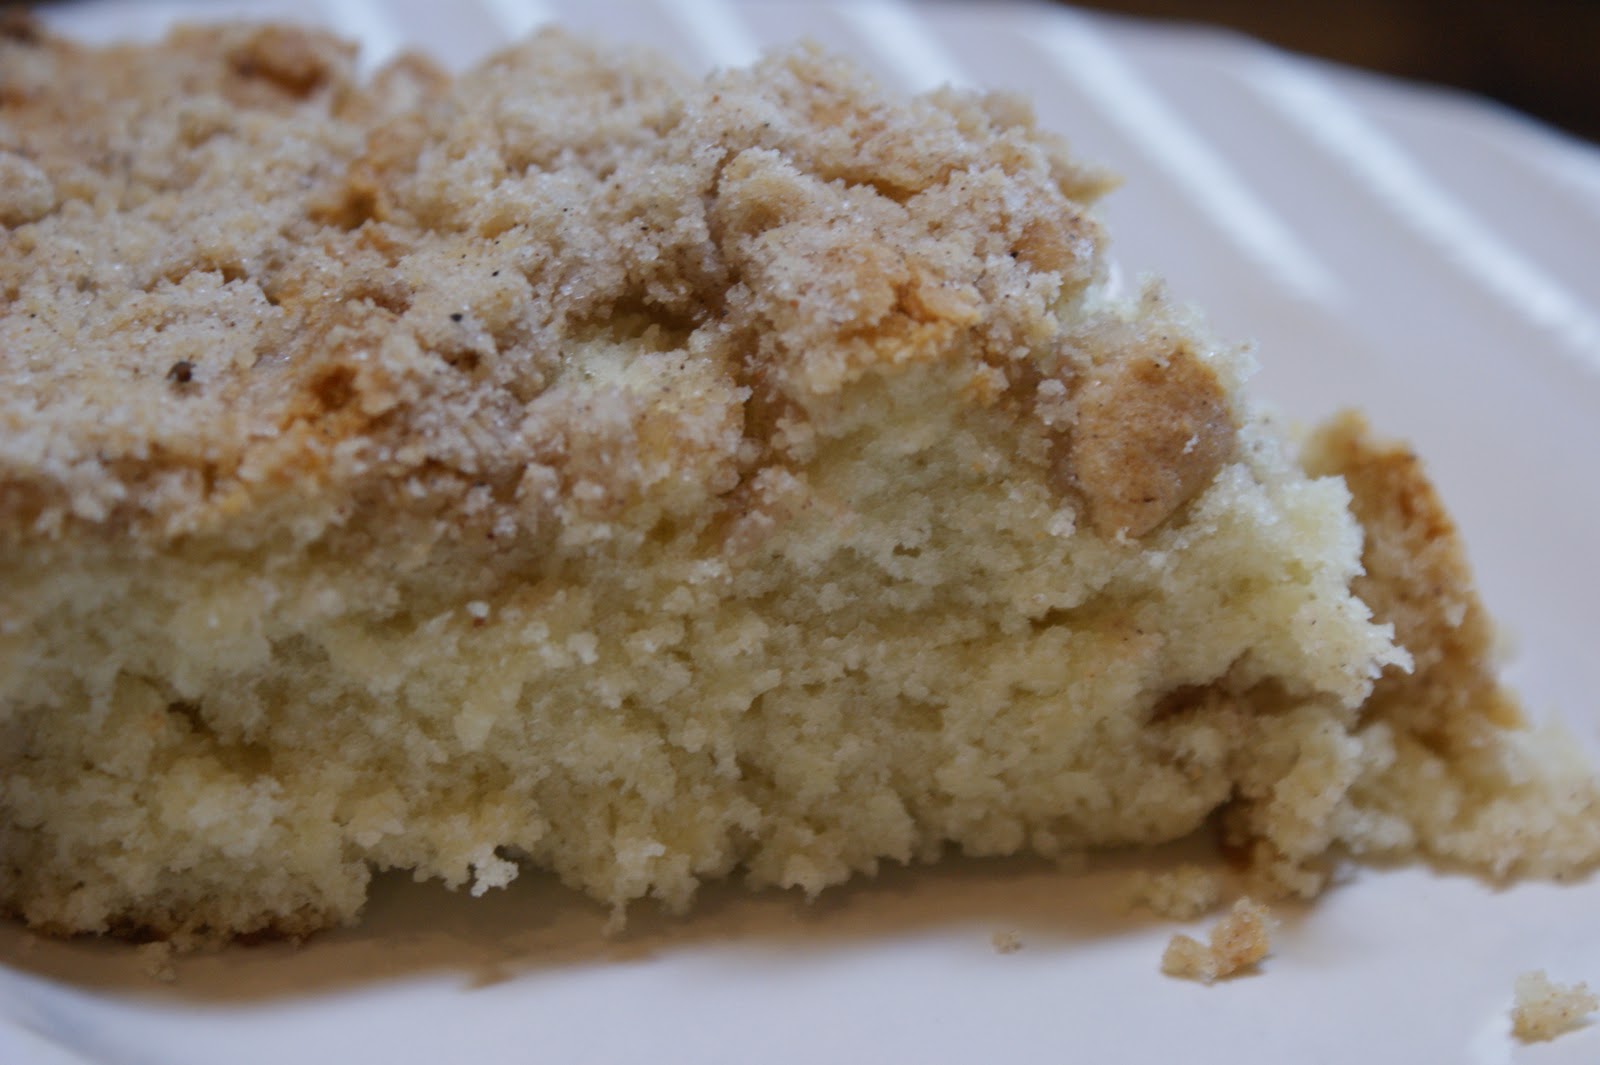
Good Morning Breakfast Cake! To make this beautiful moist cake you will need:
4 1/2 Cups Flour
3 Cups Sugar
1 tsp. B. Powder
2 sticks soft Butter
Combine these 4 ingredients and mix until it gets crumbly. Reserve 1 cup for topping.
Add 3 eggs to your crumb mixture along with 2 cups buttermilk, 1 tsp vanilla, and 1 tsp b. soda. Pour into 3 round cake pans.....Take your 1 cup of reserved crumbs and mix in 1/2 tsp of nutmeg and 1 Tb. cinnamon and sugar. Sprinkle over the top of your cakes and bake @ 350 until tooth pick comes out clean. About 45 to 50 minutes.
Please don't mind my counter tops... I have been known to leave a trail of flour where ever I go when I bake. It's all part of the fun!
Makes for a wonderful sweet breakfast, and goes great with Coffee. I take the other two cakes and pop them in the freezer. You never know when they might come in handy!
Our ducks started laying eggs in late September and so the baking begins......
Good Morning Breakfast Cake! To make this beautiful moist cake you will need:
4 1/2 Cups Flour
3 Cups Sugar
1 tsp. B. Powder
2 sticks soft Butter
Combine these 4 ingredients and mix until it gets crumbly. Reserve 1 cup for topping.
Add 3 eggs to your crumb mixture along with 2 cups buttermilk, 1 tsp vanilla, and 1 tsp b. soda. Pour into 3 round cake pans.....Take your 1 cup of reserved crumbs and mix in 1/2 tsp of nutmeg and 1 Tb. cinnamon and sugar. Sprinkle over the top of your cakes and bake @ 350 until tooth pick comes out clean. About 45 to 50 minutes.
Please don't mind my counter tops... I have been known to leave a trail of flour where ever I go when I bake. It's all part of the fun!
Makes for a wonderful sweet breakfast, and goes great with Coffee. I take the other two cakes and pop them in the freezer. You never know when they might come in handy!
Subscribe to:
Posts (Atom)